How to Analyze Your Best and Worst Performing Products
Learn how to analyze your best and worst performing products so you can improve cash flow, reduce slow-moving inventory, protect profit, and make smarter buying decisions.

If you have to track many employee work hours, you might want to use QuickBooks’ Timesheets.
Last month, we introduced the concept of time tracking in QuickBooks. Using the software’s tools, you’re able to record individual blocks of time that employees have worked, so that you can include them in payroll and billing customers when necessary. We went through the steps required to set up QuickBooks for time tracking and walked you through the process of creating individual time entries. A completed record for billable time should look something like this:
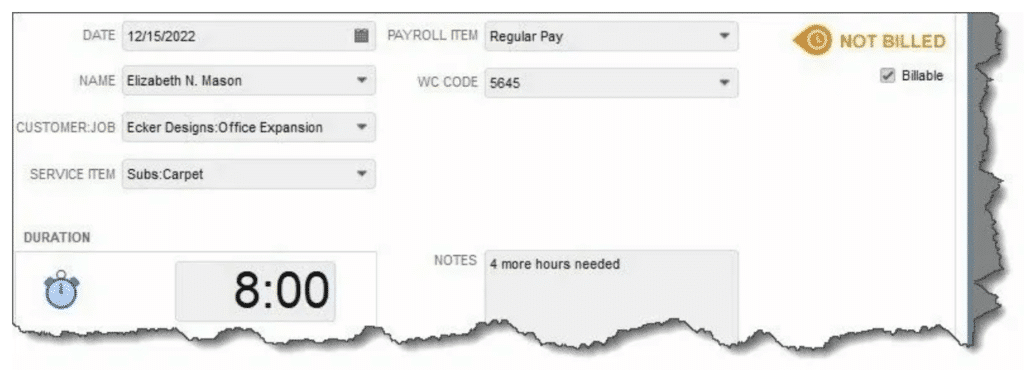
To enter an individual time record, you open the Employees menu and select Enter Time | Time/Enter Single Activity.
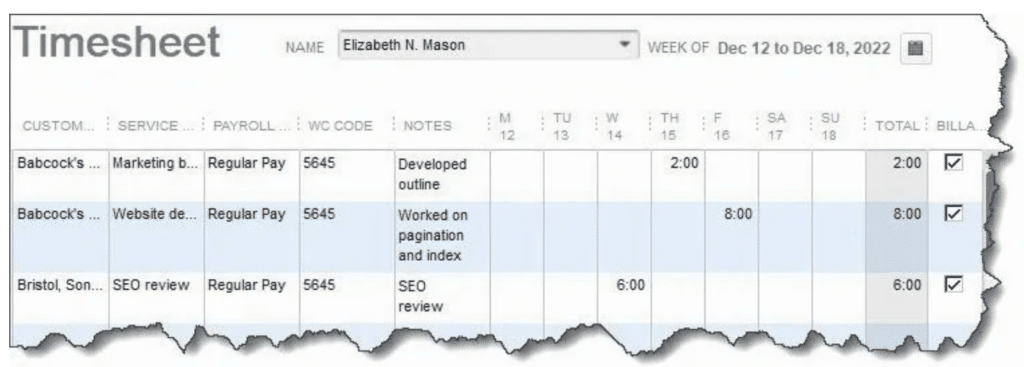
QuickBooks offers another way to enter time records that’s especially useful if you have multiple employees and many work hours to track. Open the Employees menu and select Enter Time | Use Weekly Timesheet. You can also get there by clicking the down arrow next to the Enter Time icon on the home page. This screen resembles a paper timesheet, with columns for all of the information you would enter if you created a single activity.
At the top of the screen, click the down arrow next to Name, and select the correct employee. To the right of that is the Week Of field. If you need to change the dates, click the small graphical calendar, then click anywhere in the correct week. If you have already created individual records for that employee during that week, the information for each will appear in the corresponding date column at the end of the row. And anything you enter on the Timesheet will also appear as an individual entry.
To create a new entry on the Timesheet, click the down arrow in the Customer column, and select the correct Customer: Job. Next, choose the Service the employee provided by again clicking the down arrow in that field. You want to be sure that the Payroll Item code is the right one, so choose carefully there; the WC Code (Workers’ Comp) should fill in automatically. Enter Notes if you’d like, then the number of hours the employee worked for that customer for that service in the date column. Be sure to click in the Billable box to create a checkmark if the service was billable.
Any data you enter on a QuickBooks Timesheet will also appear as a Single Activity, and vice versa.
Totals for each column appear at the bottom. Save the Timesheet and repeat the process for any other employees as needed. These hours will now be available to you when you run payroll and bill customers.
QuickBooks makes it easy for you to see the time data you’ve entered. It offers four pre-formatted reports that tally this information in different ways. Open the Reports menu and select Report Center. Locate Jobs, Time & Mileage in the left vertical pane, and click on it. Scroll down to the Time heading to see these four reports. They are:
When you open a report, you can double-click on any number in the Duration column to see the underlying detail.
When you create an invoice for a customer who needs to be billed for services provided, QuickBooks displays this message:
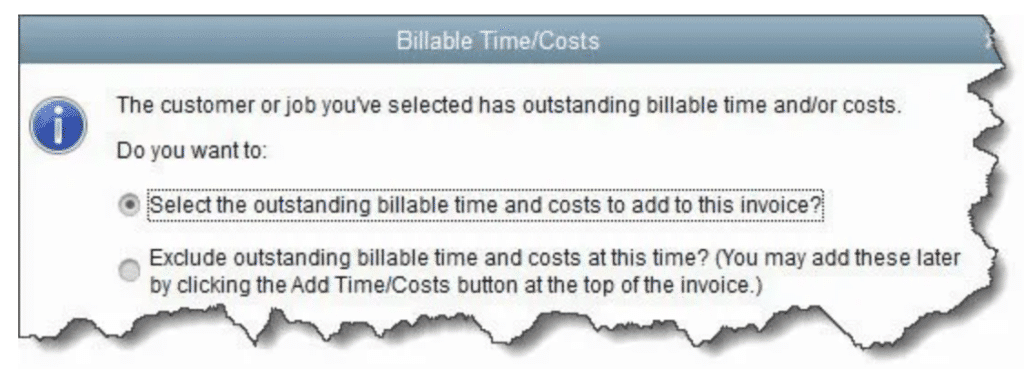
To make this standard procedure, check the box in front of Save this as a preference.
QuickBooks offers another way to bill for time and expenses that allow you to create invoices in batches. Open the Customers menu and select Invoice for Time & Expenses. In the window that opens, specify your Date Range, and make sure the Template showing is the one you want.
Click in the column in front of each Customer: Job you want to bill and then click Next Step. You can Review Billables to see details and Edit Options by clicking on those buttons. Click on Create Invoices and make sure each customer’s Preferred Send Method is correct in the next window before dispatching them.
QuickBooks’ time-tracking tools may be all your company needs. But if you find them lacking, talk to us about adding TSheets, an integrated solution that adds more advanced features. And let us know if we can help with your use of QuickBooks’ own tools – or any other aspect of your accounting.
Learn how to analyze your best and worst performing products so you can improve cash flow, reduce slow-moving inventory, protect profit, and make smarter buying decisions.
Many retail and eCommerce business owners wait until year-end, tax time, or a cash crunch to review inventory. By then, slow-moving stock, overbuying, missing products, and cash flow problems may already be hurting the business. Learn when to review your inventory and how a better rhythm can help protect your cash.
Many retail and eCommerce business owners run everything through one bank account and wonder why cash always feels tight. A Profit First approach helps separate money by purpose, including inventory, profit, owner’s pay, taxes, and operating expenses. Learn how six bank accounts can create better clarity around your business finances.